1

Kepelikan buat Assgment

Laz week pada hari Jumaat aku pulang ke Johor
untuk membuat asgmnt yg diberi dengan tenang
Perjalanan yg mengambil masa lebih kurang
4 jam 1/2..
penat nye Tuhan je yg tahu..

rasa nak pecah punggung lelama kat atas moto..
tapi t dah bese xpe..
hehe..

8tiviti kat sana :
- Mandi dah semestinya.
- Buat Assignmentla pe lagi.
- Jalan-jalan kat Parit Raja.
- Beli jajan.(sedap wooo..)
- Buka n sahur :
> ayam kurma,
> ayam goreng,
> mee goreng,
> sayur,
> air teh suam,
> air kosong,
> sambal kicap,

Rumah kat Kampung..... >>

0

Today programme

Assalamualaikum. .
lamanye x blogging nie..
hari nie terbuka la jari-jemari aku untuk menaip..

9am
terus bersiap ke bus stop seksyen 18,
kebetulan ada sebuah bas tengah tunggu,
aku pon dengan sepantas kilat berlari,
sesudahnya aku pon turun bus stop berdekatan dengan KTM Shah Alam.

10am
meet my big sister,
dye yg ajak aku p jalan2 kat low yatt,
punyela puas hati jalan kat sana,
tengok camera, hp, laptop, pc, baju kapel dll.

11am
Times Square,
makan kat McD,
aku mintala (ape ntah lupa),
akk aku beli GCB,
rasanya kureng enak,

12pm
beli CPU untuk akk pertama aku,
semuanya RM450,
puas hati gakla,
semuanya baru lagi,

2pm
sampai di rumah terus solat,
sidai baju,
pastu beli la ayamas black pepper Rm14.40.

now
baru abes packing barang untuk pulang ke Kuantan esok,
lepak2 jap sambil layan lagu..
0

Adjusting the Depth of Field

Today lesson i learned

Adjusting the Depth of Field


This tutorial is to help you learn how to adjust the depth of field for any photo. To do this normally you would have to know what aperture to use on a camera. But with this tutorial you can just artificially lower the depth of field in photoshop. Ok, once you have your picture open in photoshop:

1. Make a copy of the Background Layer, so you have two layers with the exact same photo on them (Layer>Duplicate Layer).

2. On the top layer (with the top layer selected) apply a Gaussian Blur Filter (Filter>Blur>Gaussian Blur). Set the Radius to somewhere around 14.7 pixels. This might vary according to your desired intensity.

3. Then select the top layer, and add a Reveal All Layer Mask to it (Layer>Add Layer Mask>Reveal All).

4. Then select the Brush Tool (B) and select a big, soft paintbrush.

5. Then (with the layer mask selected) simply paint brush the color black anywhere on the photo where you would like something to be in focus.


For this technique it is a good idea to sometimes change the opacity of the paint
brush you are using. By changing the opacity you can blend the effect and make
the low depth of field look more realistic. For this photo you can see where I
lowered the opacity as I brushed toward the back of the car so the gaussian blur
is only partially erased in some areas.

0

Day at Bukit Pelindung & Teluk Cempedak

Pada semalam dah rancang nak naik Bukit Pelindung,
jadi, inilah shot yang aku ambil. . .


sampai2 je dah jumpa kala jengking nie..
shotla..


Masa nie abg krul kita sedang berbincang n gaya seperti mahu jadikan dorg model..
hahaha.. tengok jela dari jauh..

antara yg ada :
-Ada
-Erny
-Humaira

0
Hari nie aku dah blaja satu teknik adobe photoshop..
model aku nie nama nya

Suriyati Hashim

tajuknya,


Vintage Text Overlay

with this tutorial, you'll learn how to create an old world look with your pictures.

step one - picking a picture

select any picture that's fairly large, and has a somewhat large object. here is the picture I am using:


step two - textttt.

the next step is to find a bunch of text. it doesnt really matter what it is. i'm going to use a bunch of jibberish. lipsum is a good site for filler text.
get about 10 or 15 paragraphs of text, and copy and paste it to your clipboard.

step three - pasting and shizz

now, with the text tool, select the entire image, and paste the text from the clipboard onto it. no spaces in between paragraphs is prefered. change the size of the text according to the size of the image. if your image is large, use larger text, and if it's small, use smaller text .. just make sure you have a good amount.
here is how my image looks so far


step four - finishing up

now, set the text layer's blending mode to "overlay" with 70% opacity.

done

here is how my final result looked


0

KEMALANGAN ! !

Alhamdulillah. .
kemalangan ni berlaku pada ayah aku. .
syukur hanya kereta yg remuk. .
orangnya sihat. .

kejadian ni berlaku awal pagi tadi. .
setelah tiba, ini snap2 yg sempat aku amik.


dan inilah orang yg melanggar nye. .
perempuan dua orang yg dalam gambar tu n ada laki sorang. .
xnampak dalam gambar tu.. sembunyi di balik tabir. .

0

After

Memang banyak yg aku nak tepek kat blog nie,
tapi apakan daya, rasa yg teramat penat untuk mlakukan semua nie. .

esok aku p KL..
mau try jalan p Dataran Merdeka. .

Sebab ?!
1-Aku nak jumpa ngan belangers Ahad nie, so better aku tau2kan jalan kat sana. .
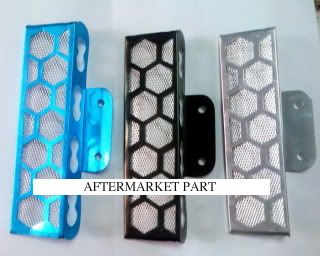
2-Aku dah beli barang ngan dealer, angkut benda nie ↓

3-Saje jela nak abehkan minyak motor.

Semenjak aku join forum ni:

www.belangr150.org

banyak yg aku plajari. .
mata aku juga meliar melihat. .
tergugat iman dan duit ku. .
hahaha. .